This blog helps our subscribers to get a detailed review and pricing of all the electronic products releasing in India. The viewers will get the opportunity to compare the prices and features of different brands.
Thursday, May 28, 2020
AMD Ryzen 5 3600 Detailed Review 2020
Wednesday, May 27, 2020
Complete Windows 10 Formatted Recovery Solution in 2020
Windows 10 Formatted Hard Drive Recovery Situations in 2020
- I formatted my hard drive in Windows 10, is it possible to recover partial files as the drive is formatted?
- Yesterday I updated my Windows 10 system, after update, a partition was formatted. That’s weird, how can I get my files back?
- A window always asks “the hard drive is not formatted, do you want to format it now?”
- My hard drives are formatted after I upgrade my PC to Windows 10, how to recover the files?
- After my Windows 10 system automatically updates, the partition is forced to be formatted. How can I do?
- I formatted my hard drive when use free upgrade in Windows 10, now can you help me recover my files?

Windows 10 formatted data loss is a big headache. Human errors, systems errors get your Windows hard drive formatted and remove all the files from your hard drive. That’s really painful, the precious data on the hard drive partition are all gone, especially when you have no backups or alternatives. How to recover lost files after Windows 10 hard drive is formatted? There is no 100% perfect answer. But there are some good solutions you can try to recover your files from a Windows 10 formatted hard drive.
Recently, many Windows 10 users are losing their data due to Windows 10 upgrade & update format error. After the Windows 10 operating system, the hard drive may be formatted unknowingly. And some users lose their data due to directly format Windows 10 hard drive. Anyway, Windows 10 format data loss is really a big problem. We strongly recommend you to recover your Windows 10 formatted hard drive with Do Your Data Recovery Professional – a very powerful data recovery program.
Windows 10 Formatted Hard Drive Recovery Situations in 2020
Windows 10 Formatted Recovery Steps
First of all, please quickly download and install Do Your Data Recovery Professional on your Windows 10 computer. Please don’t install it on the formatted drive where you want to recover data from in case that it will overwrite some of your lost files.
Here are the easy steps to recover lost files from Windows 10 formatted hard drive using Do Your Data Recovery Professional.
Windows 10 Formatted Hard Drive Recovery Situations in 2020
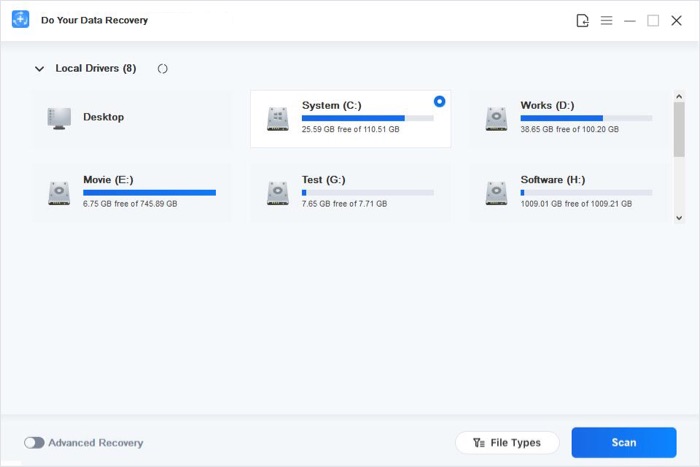
Step 1: Select the formatted hard drive.
Run Do Your Data Recovery on your Windows 10 PC, then select the formatted hard drive to start data recovery.

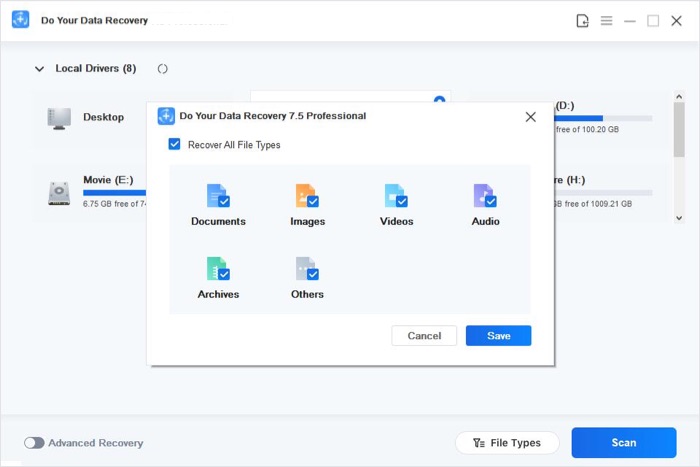
Step 2: Select file types you want to recover.
Do Your Data Recovery supports to recover all types of lost files from formatted Windows 10 hard drive. Then scan the formatted hard drive and find lost files.

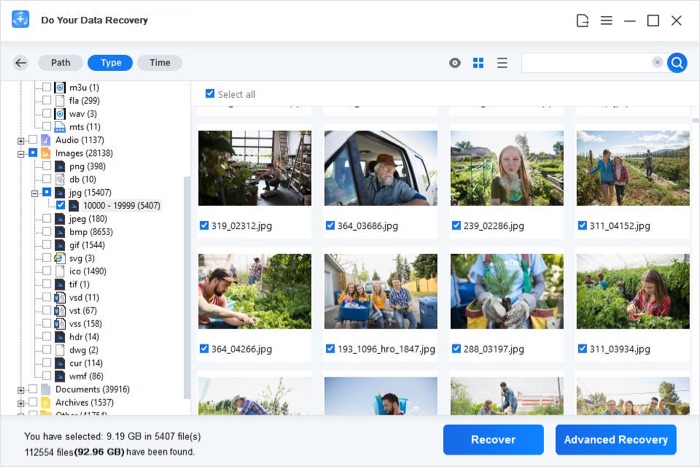
Step 3: Preview and recover files.
After scanning, you can preview all recoverable files. Just select the wanted files and save them on your Windows 10 PC.

Windows 10 Formatted Hard Drive Recovery Situations in 2020
Windows 10 Formatted Hard Drive Recovery Tips
- 1. Before you get all your files back, please don’t write to the formatted hard drive.
- 2. If you can’t find the files you want after a quick scan, just try deep scan to find much more lost files from your formatted hard drive.
- 3. When the system asks “The hard drive is not formatted, do you want to formatted it now?” Don’t do that, just use Do Your Data Recovery Professional to recover data from it.
- 4. To avoid data loss again, you’d better back up your files regularly with backup software or other methods.
Do Your Data Recovery is the best Windows 10 data recovery software. It not only can recover deleted files from Windows 10 hard drive, but it also can recover formatted and inaccessible data from Windows 10 hard drive. It can recover all types of lost files from any hard drive or storage device.
How to View and Cleanup Temporary Files in Windows 10?
Option 1: Using Windows File Explorer
- Go to the Windows Cortona (search box) next to the Start button and type “%temp%” to locate the temporary files folder on your computer then click on the folder from the results.
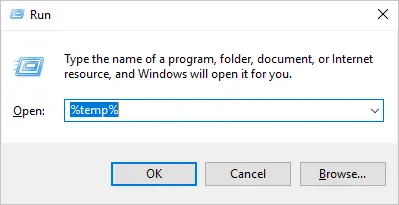
- Alternatively, open the run utility by pressing “Win + R” keyboard shortcut keys on your keyboard, then type “%temp%” and then press enter or click “OK”.
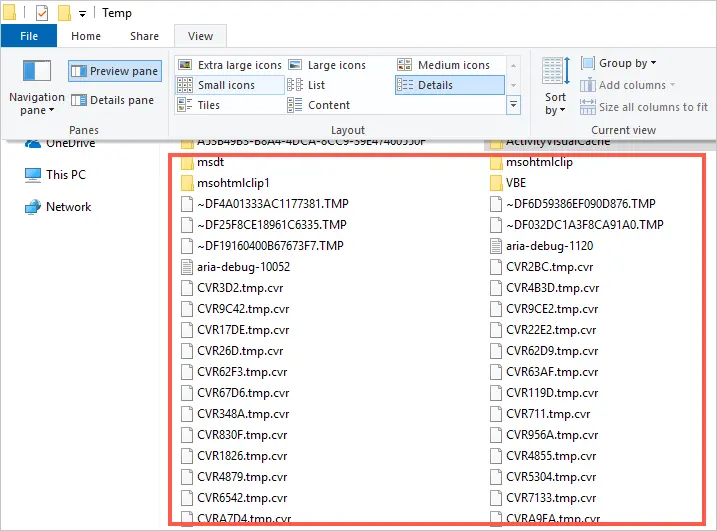
- This will open the “Temp” folder which holds all the temporary files and folders. To view all the files in this folder, go to the view tab and tick the “Hidden items” checkbox.
- In order to delete the temp files – select everything in the folder by pressing the “Ctrl + A” keys on the keyboard. Otherwise, click the first item, scroll down to bottom of the folder contents, then hold “Shift” on the keyboard and click the last item to highlight all.
- You can press “Shift + Delete” keys from the keyboard to delete the files permanently. Or Right-click inside the folder, click “Delete” to move the files to the “Recycle Bin”.
- When asked whether you want to delete files, click “Yes”.
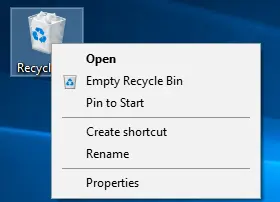
- If you have moved the files to Recycle Bin, right-click on “Recycle Bin” on your desktop and select “Empty Recycle Bin” to delete the files permanently.
Option 2: Using Windows 10 Settings
- Open the Windows 10 Settings by clicking the gear icon from the Start Menu. Or press “Win + I” keys to open the Settings app. Click the “System” settings icon from the settings panel.
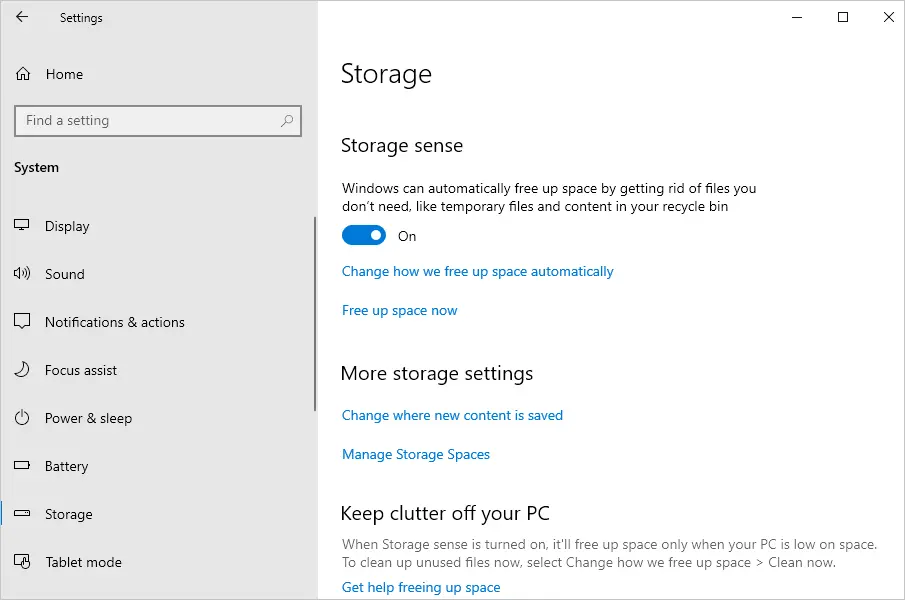
- Select the “Storage” settings from the left pane and your local storage disks will be displayed on the right-side pane. Click the disk with your Windows 10 installation.
- This will display a breakdown for your disk usage.
- Click on the “Temporary files”, Windows will scan and display all the temp files on your computer. Or follow the “Free up space now” link to view and remove the temporary files.
- You can view and tick the items you want to delete permanently. Click button named “Remove files” located at the top of the list.
- Click “Yes” on the confirmation dialog to complete the cleanup.
Option 3: Automatic Cleanup Using Windows Storage Sense
You can also use Storage Sense to automatically delete temporary files that are no longer required. To do so;
- Follow steps (1-4) in option 2 above to access the “Storage” settings.
- Activate “Storage sense” by sliding the switch to the right (it should turn blue).
- You can also customize how and when “Storage sense cleans up your computer by clicking the “Change how we free up space automatically” link then select your preferred settings.
This allows Windows 10 to automatically remove all the temporary files that you no longer need from your computer.
Option 4: View and Remove Temp Files Using Windows Disk Cleanup
There are two ways of accessing the disk cleanup tool in Windows 10:
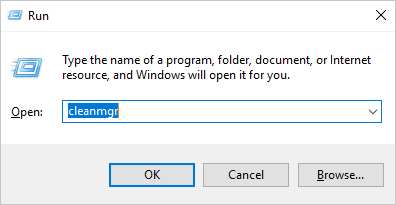
- Open the run command by using the “Windows” + “R” sticky keys, then type “cleanmgr” and click “OK”.
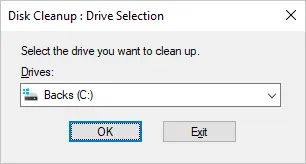
- Select the disk loaded with Windows from the dialog that appears and click “OK” button”.
- Alternatively, open the file explorer and click “This PC” to show the storage disk. Right-click the system disk then go to “Properties”.
- Navigate to “General” tab and look for and select “Disk Cleanup”.
- The tool displays a list of all the temporary files on your PC. To view the temporary files, high light the option on the list and click the “View files” button on the bottom right.
- Check the box for the files you would like to delete and click the “Clean up system files” on the bottom left.
Option 5: Delete Temp Files Using Command Prompt
- Open the run command and type “cmd” then hit Enter on the keyboard or click the “Ok” button to open Command Prompt.
- Type the following command “del /q/f/s %TEMP%\*” the press the “Enter” key on your keyboard.
If you are running out of storage space, you can free up space on your drive by getting rid of the files that are no longer in use on your computer. You can use one of the above methods to delete temporary files that could be wasting your storage space. There is no risk in deleting all temp files as Windows will not delete files that are currently in use.